
This is a page dedicated to displaying projects from DP Shop Talk episodes that have been built by viewers. I want this to be a page where ideas and thoughts can be shared. It's a place where you can see some variations or modifications on the designs that I've come up with, as well as exact copies.
If you have built one or more of the DP Shop Talk projects and would like to have it featured, you can submit it by clicking on the button below. Please send photos along with a brief description. Also, be sure to leave your comments, thoughts or questions at the bottom of the page and let's get some shop talk going!
Be sure to share your work with your friends by clicking the 'share' button at the bottom of the page, just above the comments ↓
Table Saw Overarm D.C. - Ms. Tinker Town
Ms. Tinker Town has built her own version of the table saw overarm dust collector that also serves as a full blade guard. Read her quote below about how she arrived at this design and setup. Great job on the overarm Ms. Tinker Town, I like how you've incorporated a full guard into your design.
"I am always being aware of my safety. I have been wanting and looking for an overarm blade guard for my table saw, but never came across anything that suited me. After watching Dan’s video I thought now I could do something like that. So “Tinker Town” is getting an upgrade. In my dreams I have a Felder with the sliding table and the wonderful overarm blade guard. Then I wake up and poof its gone. But now I am well on my way to that dream. Thanks Dan for the great inspiration. The Felder style blade guard also can support another piece which allows me to set the blade at 45 degrees. Also the arm swings as to get it out of my way when needed. I will soon be adding a slide table and a router. Cheers to all us DIYers and wannabe engineers. Also I will be taking care of all the sawdust with Dan’s inspired dust collection upgrades. Which will run on dedicated shopvac buckets."
-Ms. TT

Table Saw Overarm Dust Collector - Ms. Tinker Town
Table Saw Overarm Dust Collector - Fran L.
Fran from Pennsylvania has built his own version of the table saw overarm dust collector. He reused old fitness equipment to build the overarm and also utilized it for storage of table saw accessories. Great job on the overarm Fran and I love your recycling of materials and storage efficiency.
"My installation is about 90% complete, I still have work to do on the hose location and a remote switch for the dust extractor. The dust capture off the blade is excellent! I haven't cut a notch in the front side of the "dust hood" yet, I'm not sure if I'll need it or not. I'm using the horizontal structure of the arm for handy access to frequently used saw accessories. Even after installing all the accessories on the arm, I don't detect any sag in the arm, probably due to the steel structure (Attached photo). Many thanks for your design, the video of the project and your personal response to my question. It was a fun project that I have wanted to attack for years but wasn't sure where to start. What a great reuse of old fitness training equipment! Thanks again, I'm sure I'll be following your lead on future shop projects."
-Fran L.
Table Saw Overarm Dust Collector - Fran L.
Table Saw Overarm Dust Collector - Rob L.
Rob from Australia has built his own version of the table saw overarm dust collector and has added some great ideas of his own. You can read about his additions and modifications below. Great job on the overarm Rob and I really like your ideas about removing the dust from the blade gullets.
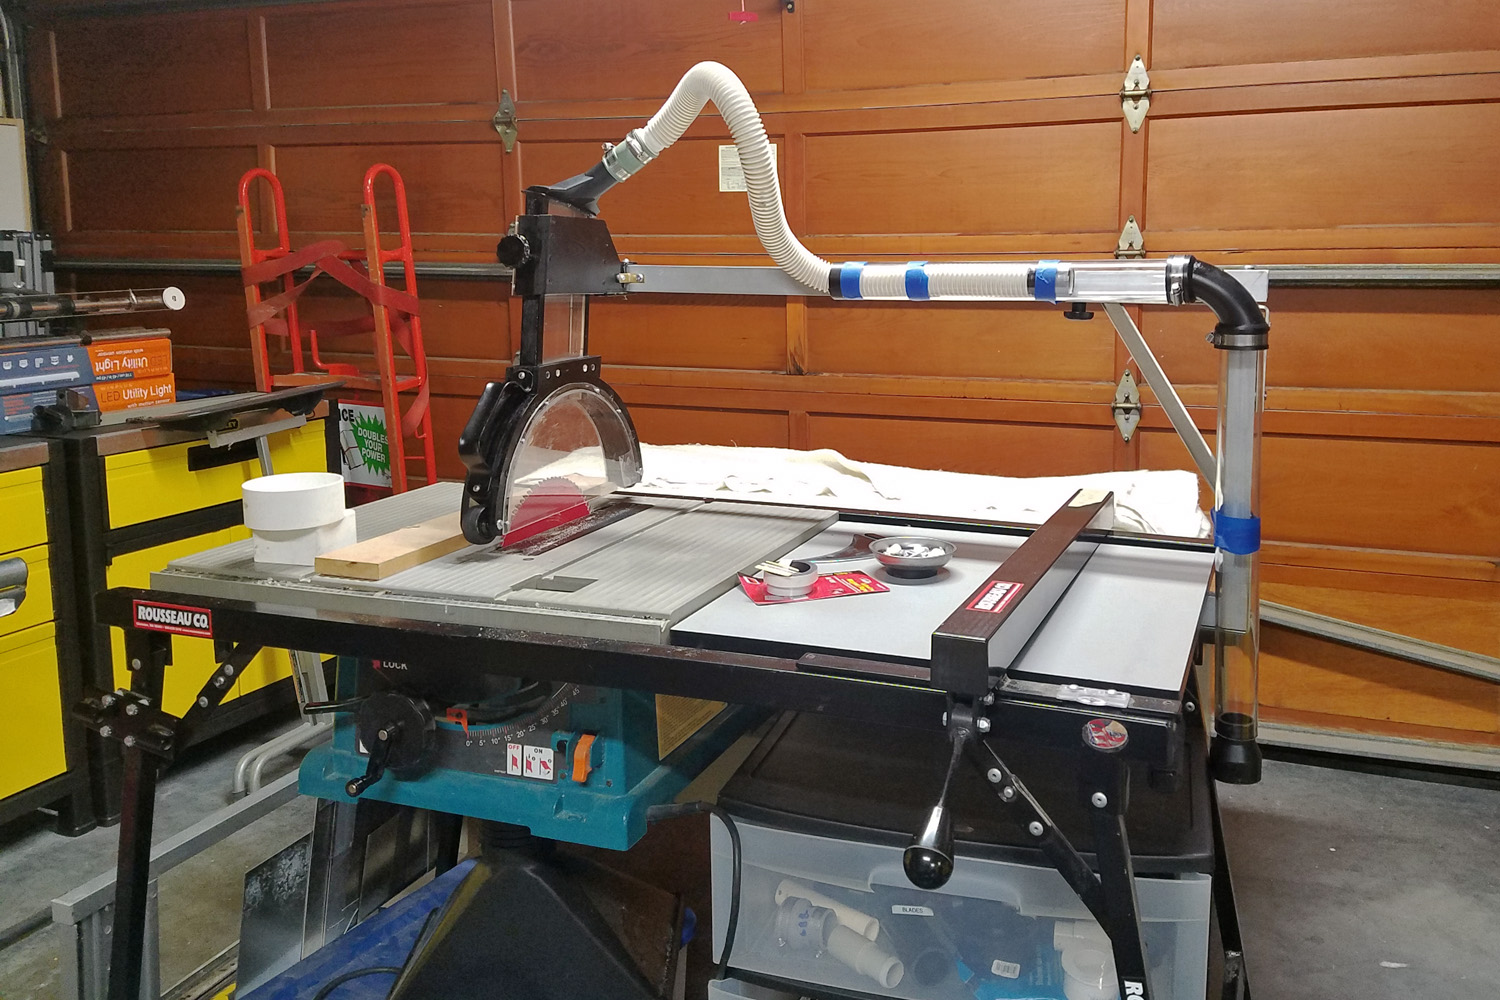
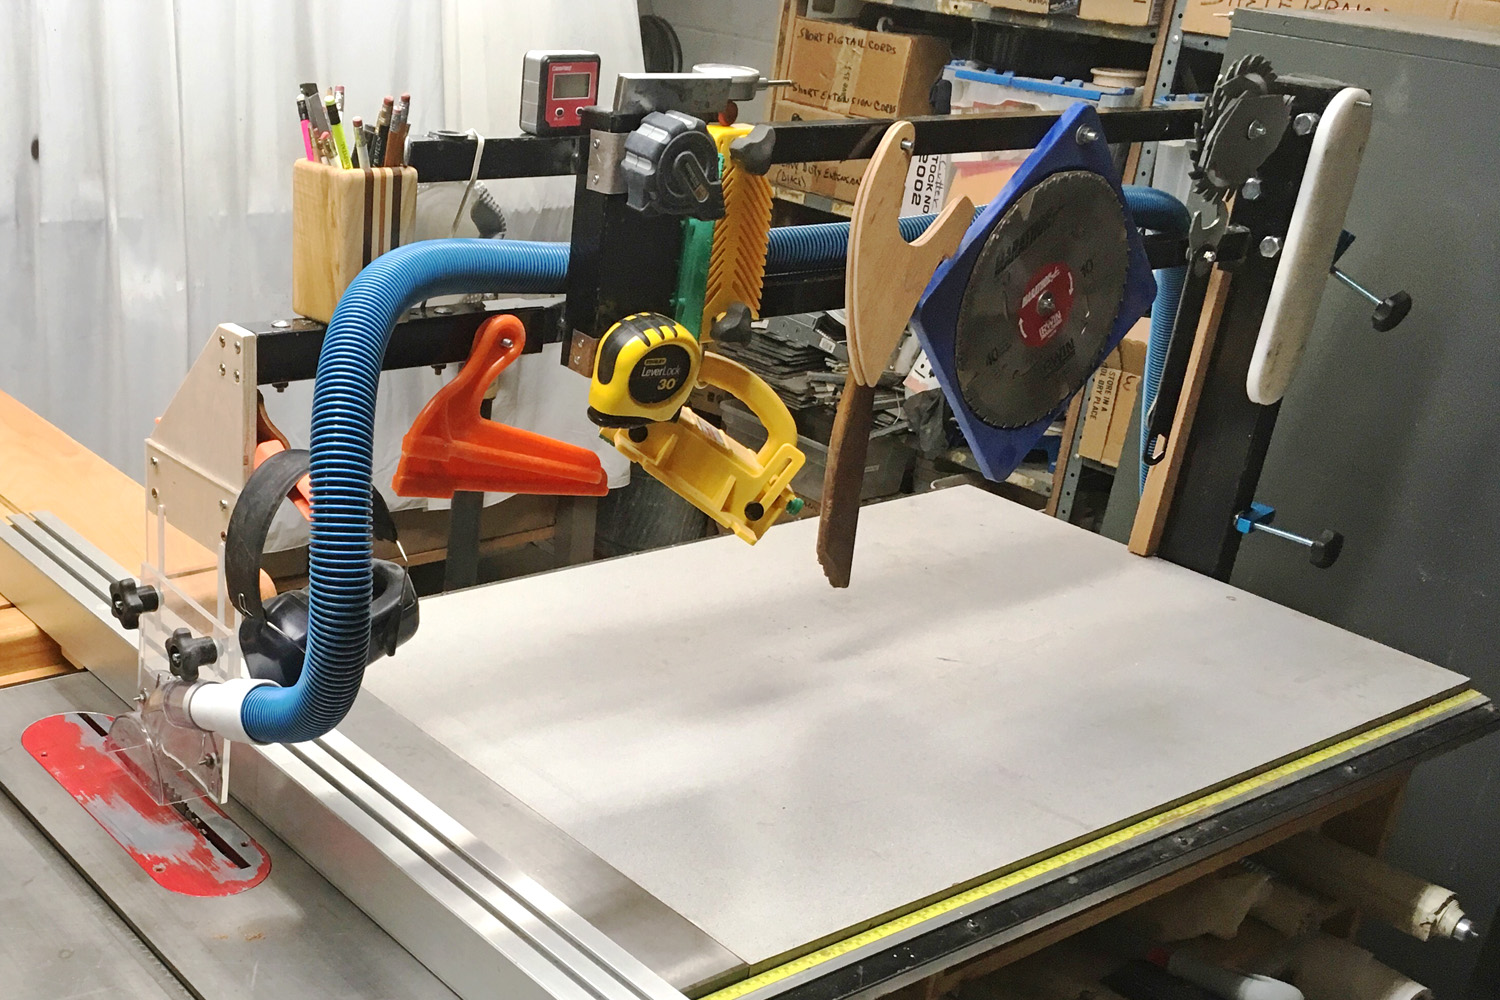
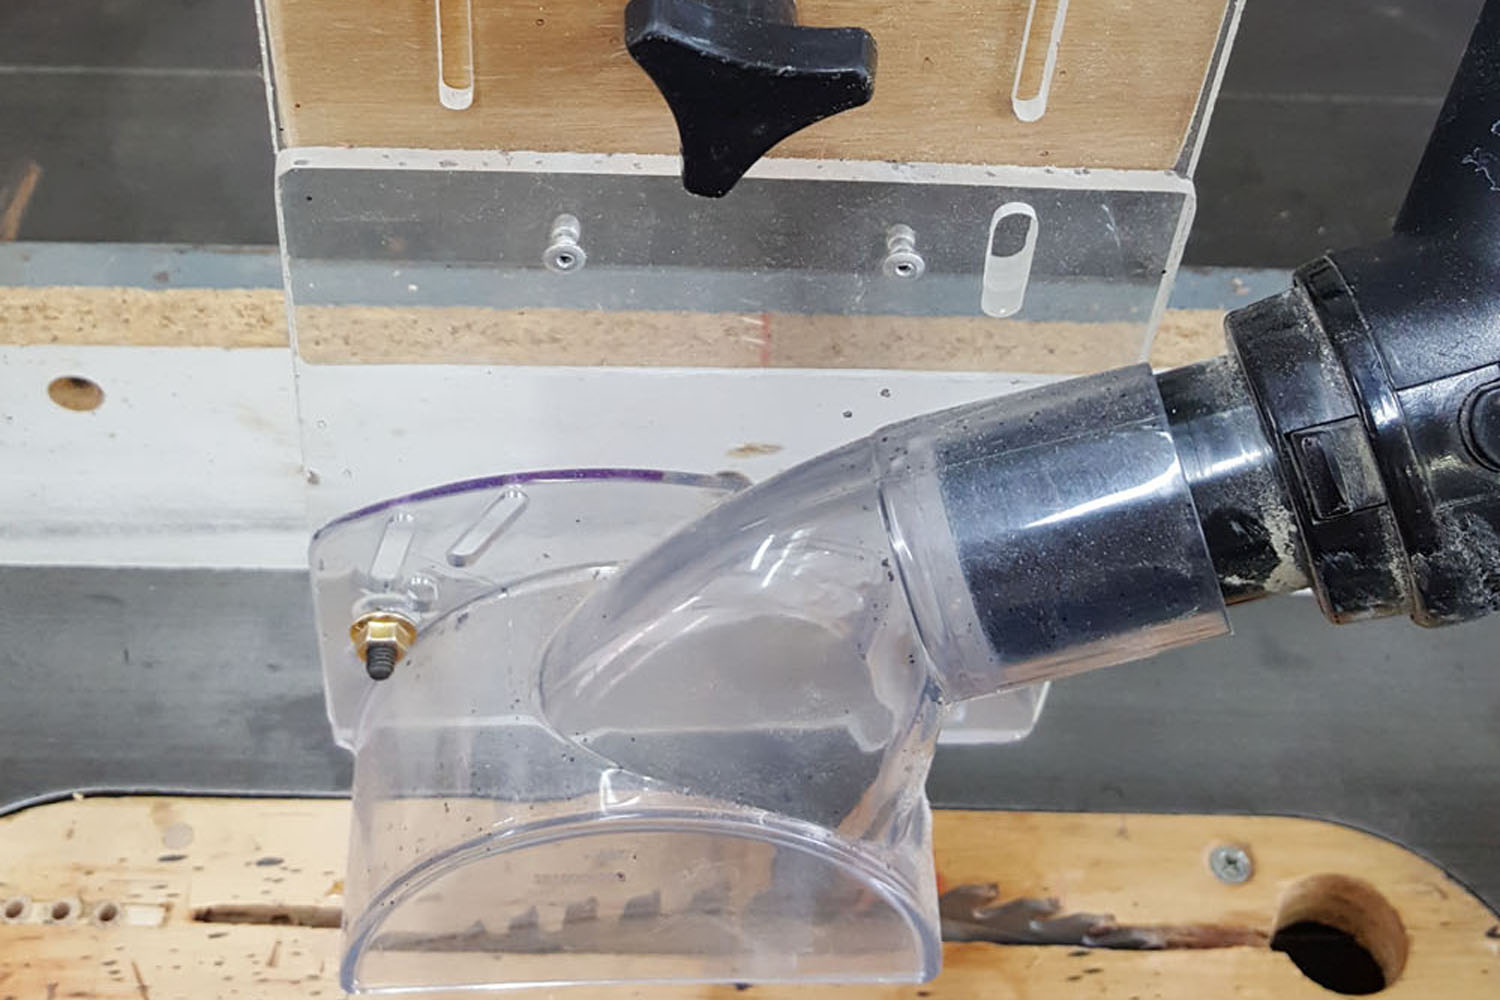
"I saw your dust collection and thought it was a winner. Since my workshop is small, a wedge of 5 metres long and 3.2 on one end and 1.8 on the other, Ineeded a compact unit hanging from the my workhorse - the 70’s Rockwell Delta 10 inch. Photo 1 shows the big picture. As you can see in photo 4, I drilled four holes and suspended a cut to fit hardwood plank to which I attached the housing for anchoring the base below the right side. Since I had a length of 25 X 50 aluminium I built a U shaped device to hang your clever dust collector. Please note the base is composed of 2 spacers to move the collector forward or backward, these are on either side of the aluminium but unable to see. The head unit (photo 2) hangs off the end of the aluminium with a piece of hardwood stuck in the end and secured with a 80mm nail (with black cap) for quick release. You will see I have the big 2hp dust extractor machine running directly to a 100 mm outlet below the blade (as seen just below the shaft bolt in photo 5). Also installed a tight fitting wooden blade surround to keep the dust inside the saw. Not convinced this is the best set up but it has certainly reduced the dust in my small shop.
On a separate note I find the dust rotates within the blade and comes out the top, not so much just above the 100mm inlet. My idea was to try and create a deflector with the board next to the blade (photo 3). I believe the dust is held in the gullet and needs air movement to be released. My next attempt will be to place a board on one side of the blade to try to make a low pressure area for the dust to move to before circling around only to come free above the top. Ideally a blast of air sideways 90 degrees to the blade would remove this gullet dust. I think if this were done it wold remove 98% of the dust. I cannot increase the air suction from the dust extractor as it already sucks in the “covers” that box in the bottom portion of the stand."
-Rob L.
Photo 1 - Rob L.
Photo 2 - Rob L.
Photo 3 - Rob L.
Photo 4 - Rob L.
Photo 5 - Rob L.
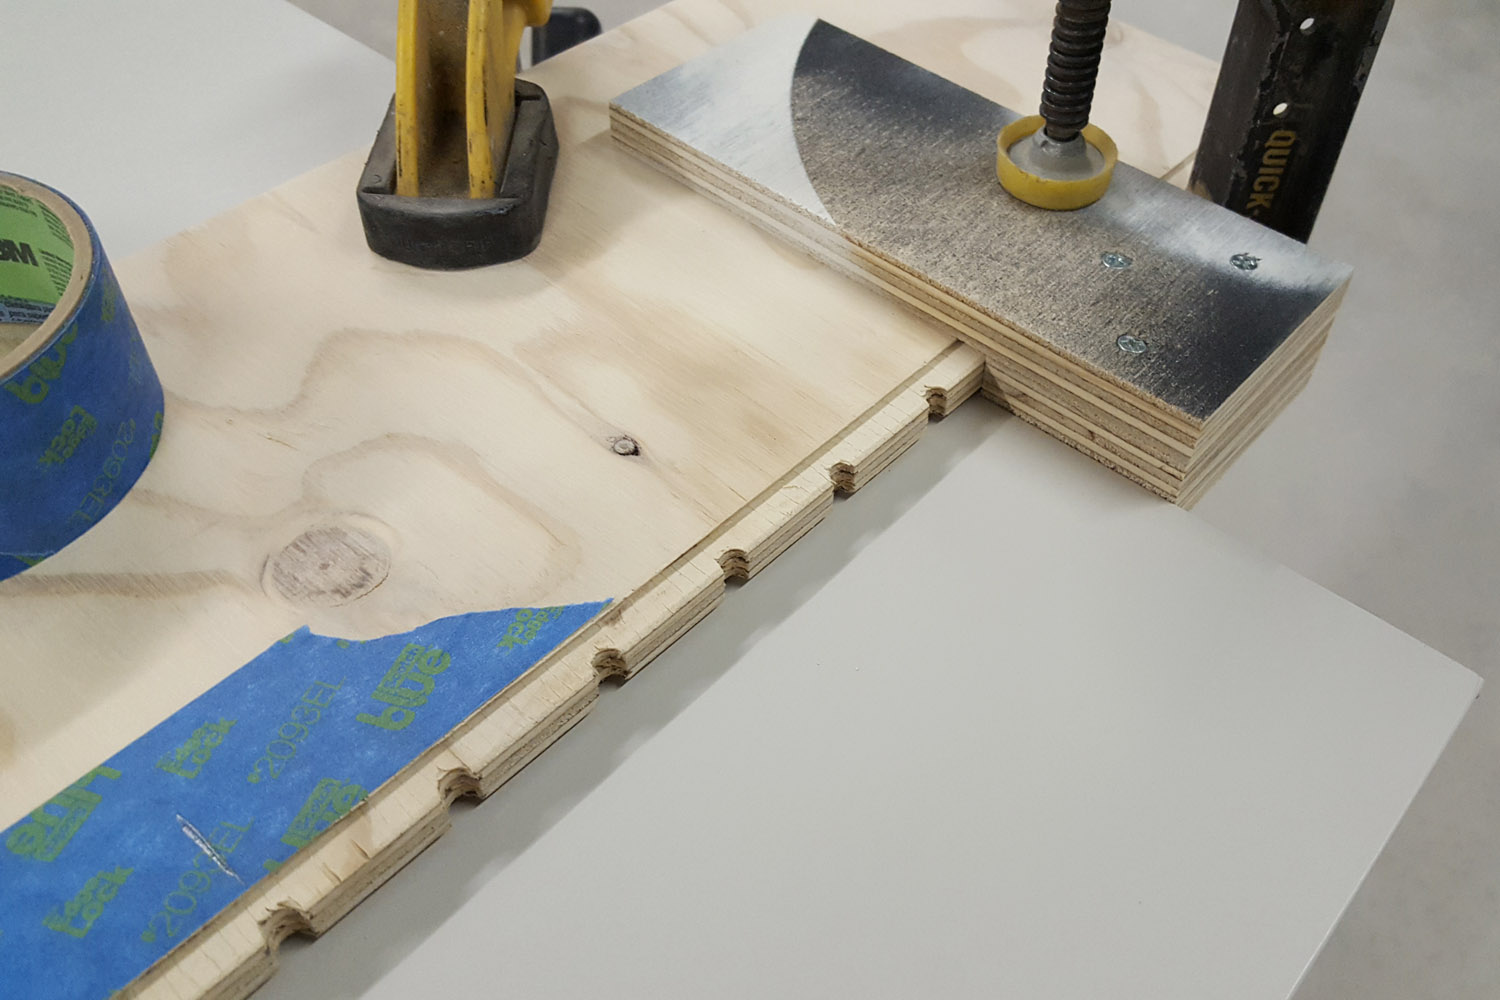
Shelf Pin Hole Jig - CG&H Builders Inc.
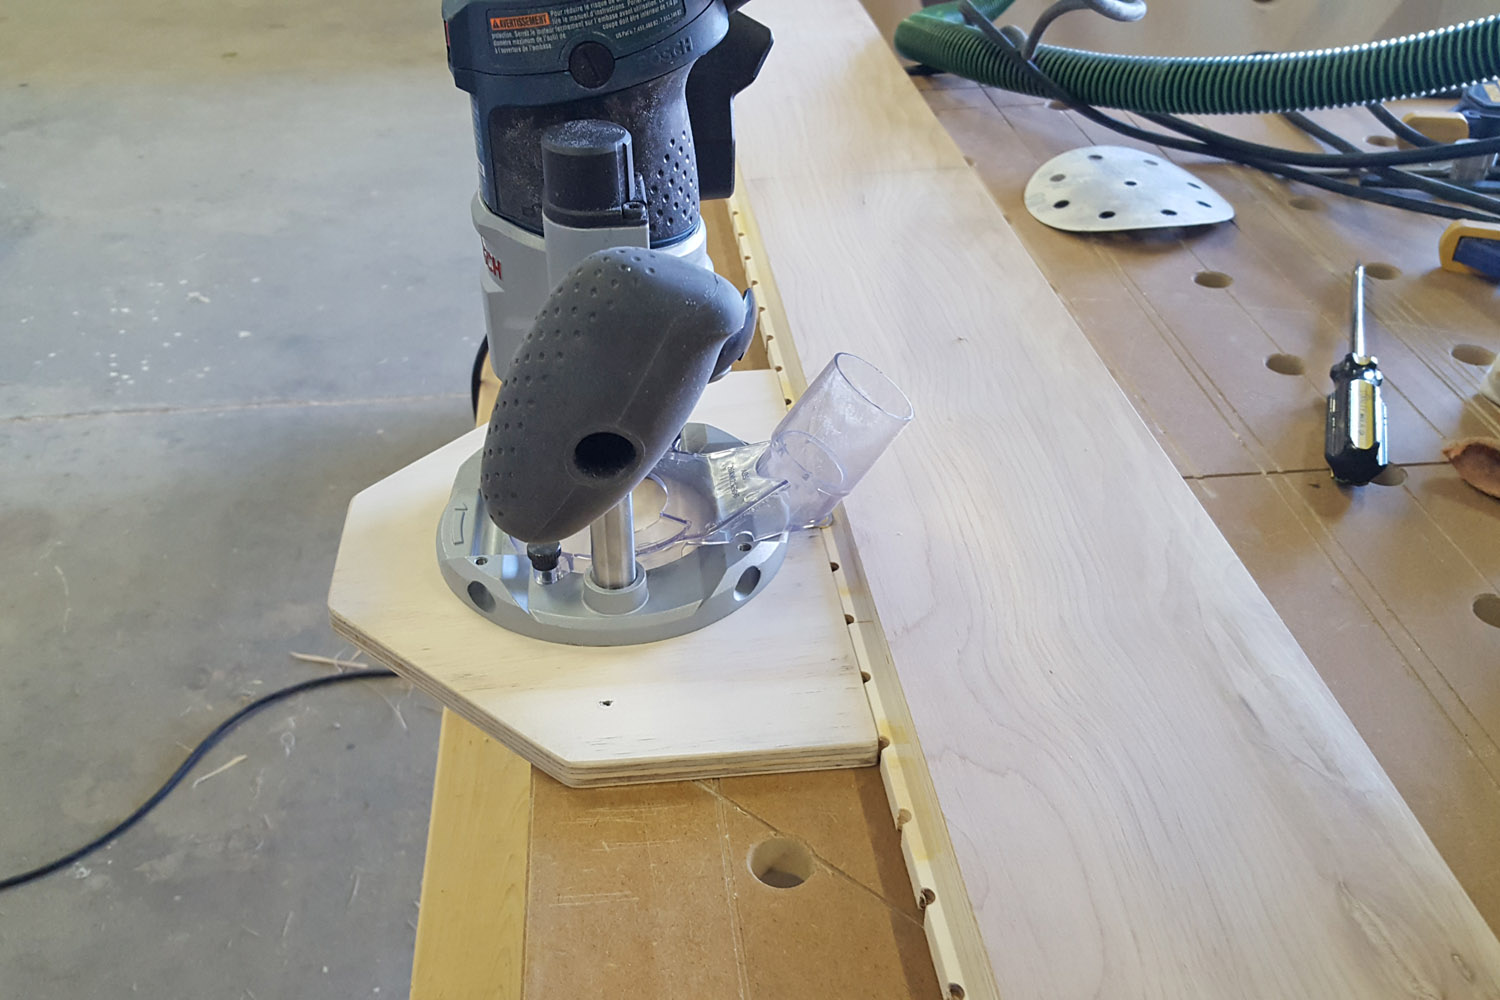
One of the guys from CG&H Builders in Ohio made a couple of different sizes of the router shelf pin hole jig to build some cabinets with. Using the same concept but with modified dimensions they were able to make shelf pin holes in long cabinet parts quickly and easily. Great job on the jigs and glad to see they worked out so well for you.
"I wanted a larger shelf pin jig for building cabinets. We don’t do that a lot so I didn’t feel the need for the Festool system or a line boring machine. When I saw his jig it seemed perfect. I made a 4′ and 8′ guide. I used my smaller Rockler jig to set the spacing because this way everything I have will match. Plus it is 32mm spacing so it matches what our cabinet guy uses for our house packages. It is a quick way to drill the holes, I like that you are not picking up the router for each hole, and it was pretty quick to make. The Bosch Colt with a plunge base and dust collection is absolutely perfect for this task. The dust collection is very good on the plunge base. I didn’t epoxy my 1/4″ shelf pin in, I flattened out an angled one and drilled and countersunk 2 small screws into the base. It is still nested in a half 1/4″ hole for stability. I recessed it into the base so I had to cut down the guides so that the top of the pin didn’t hit the edge of the guides. For me I prefer 5mm pins so I purchased a good upcut, carbide 5mm cutter for the router. I used 3/4 for the longer guide but I think the next job I have 1/2 birch on I will save a piece and remake the long one. The 3/4 is just to thick...but it works for now. I made reference blocks that set my holes 37mm from the face. I don't see needing alternate spacing but it would be easy enough to make a different set if needed. I also made a U shaped guide to clamp on the bottom to be able to flip the jig and keep the same reference from the bottom for the front and back holes. Thanks again Dan for sharing a great setup!"
-CG&H Builders Inc.
Shelf pin hole jig with Colt router - CG&H Builders Inc.
Shelf pin hole jig with stop block - CG&H Builders Inc.
Shelf pin screwed to jig base - CG&H Builders Inc.
Shelf pin hole jig with spacer block - CG&H Builders Inc.
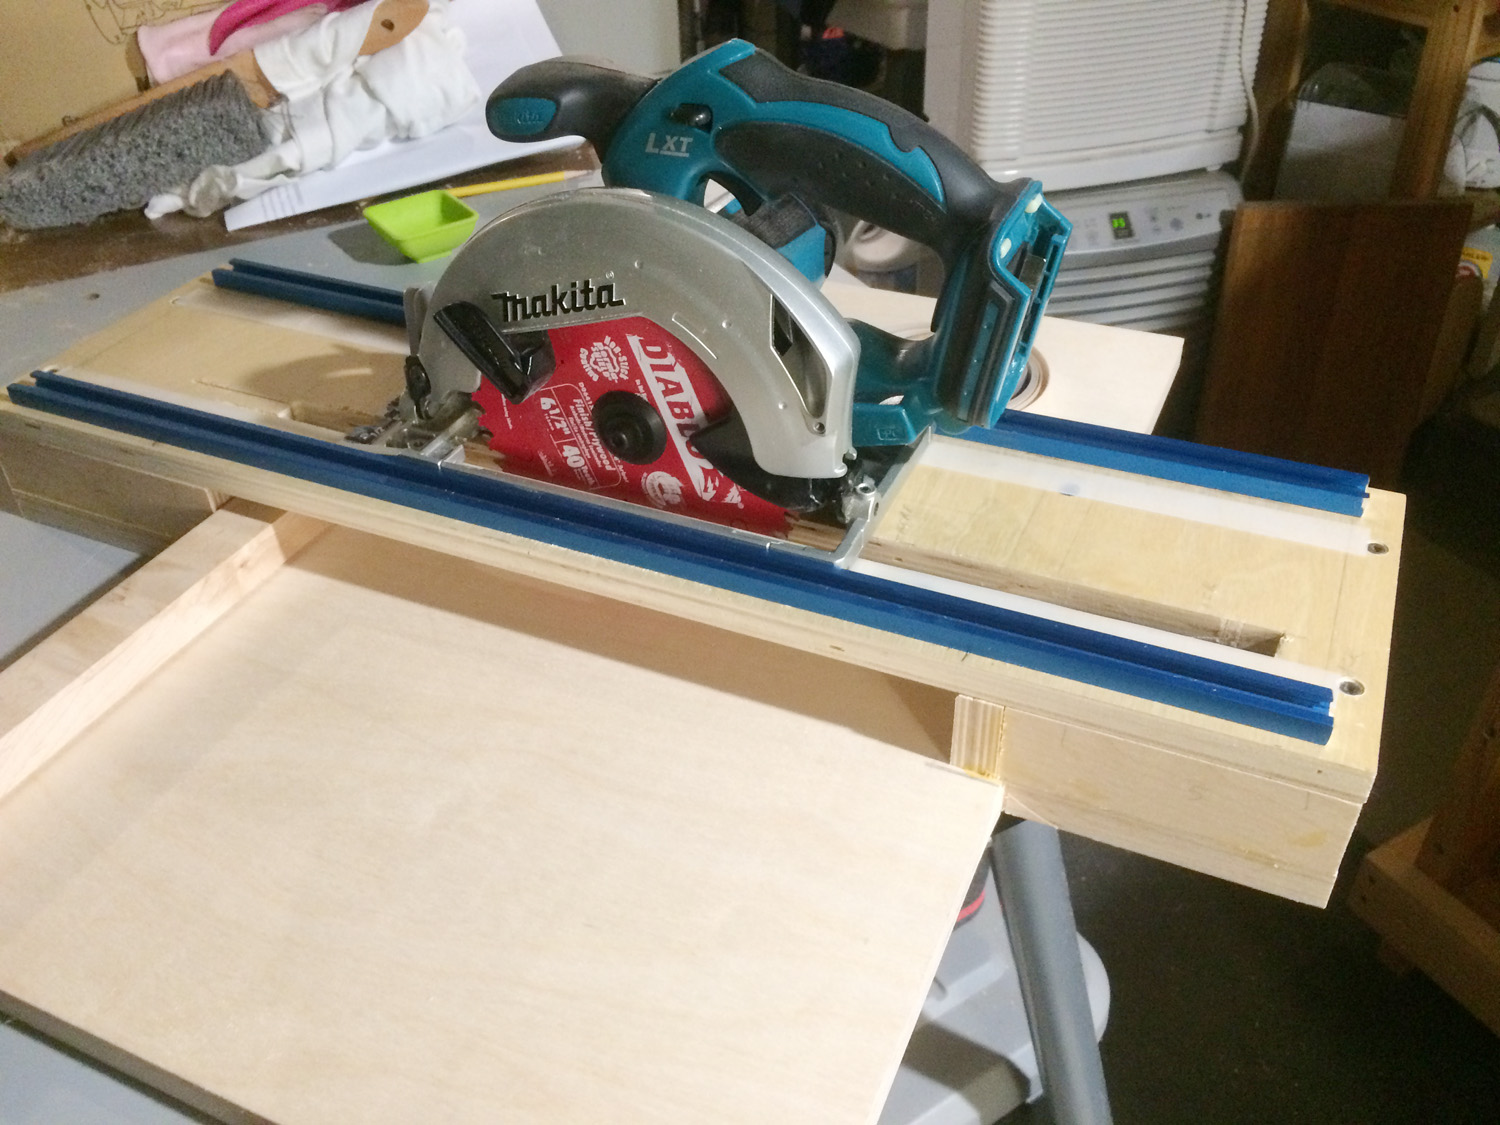
Circular Saw Cross Cut Jig - KB Woodworker
KB Woodworker built the circular saw cross cut jig to fit his Makita circular saw. The Makita saw doesn't have a groove on the bottom like the Bosch that I used in the episode so he used some side guides. Great job on the jig KB, I like the use of the T-track for the side guides.
"Here a couple of pictures that show how I adapted your jig for a Makita saw (with no groove for a track built into the base). I used some blue aluminum t-track left over from another projectto enclose the saw. I used "slippery tape" which is UHMW to make the saw slide more easily. You can see these in the closeup. The jig was dimensioned to cut 12" wide pieces. My next project is a bookshelf with 11 1/2 inch wide shelves, and this looks to make it very easy. It's still pretty portable. I'm still working on the dust collection. The hold-up is trying to find a dust attachment that will fit my hose."
-KB Woodworker
Circular saw cross cut jig - KB Woodworker
Guide track close up - KB Woodworker
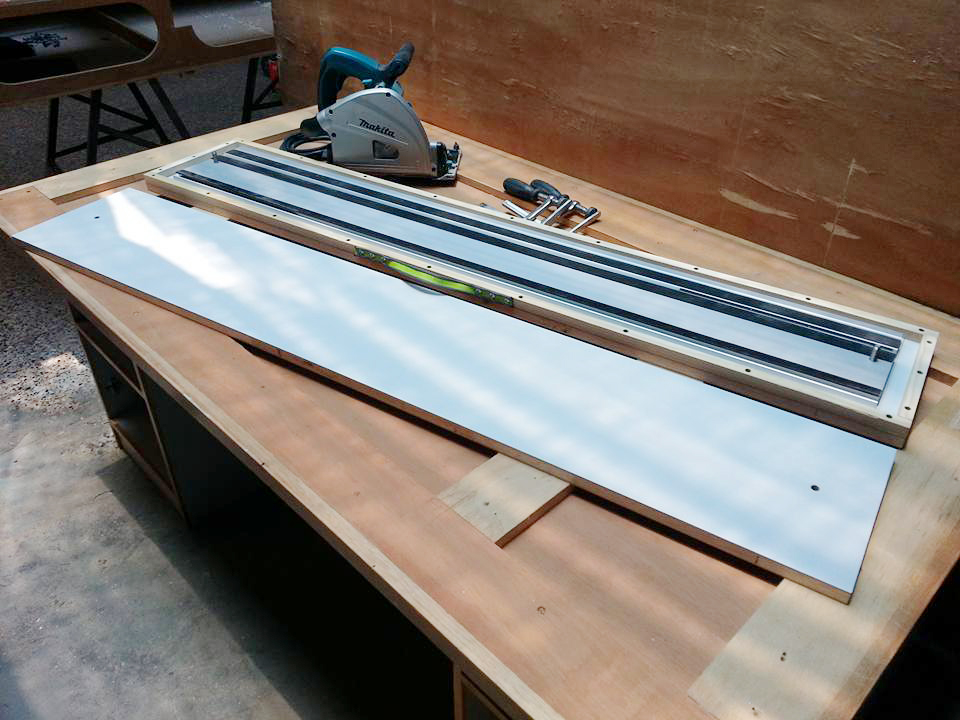
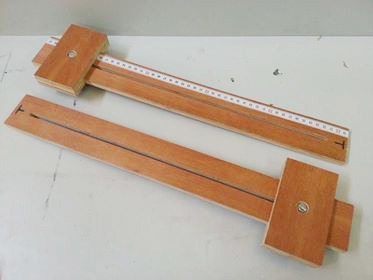
Parallel Guides & Track Saw Guide Rail Case - Khalid
Khalid made both the track saw guide rail case as well as the parallel guides from the DP Shop Talk episodes. Great job on both of the projects Khalid, I like how you used an old dog leash for the handle!
"I was working on a framing job and the owner decided to discard this office desk. It's made of 3/4" laminated block board. I load it in my truck and bring it home, dismantled it and start building some shop projects. Your rail guide case was on the top of my list. Thanks for the idea Dan. Next is to build a case for the saw, clamps and the parallel guides. The case handle is a part of a worn-out dog leash!!"
-Khalid
Track saw guide rail case - Khalid
Track saw parallel guides - Khalid
